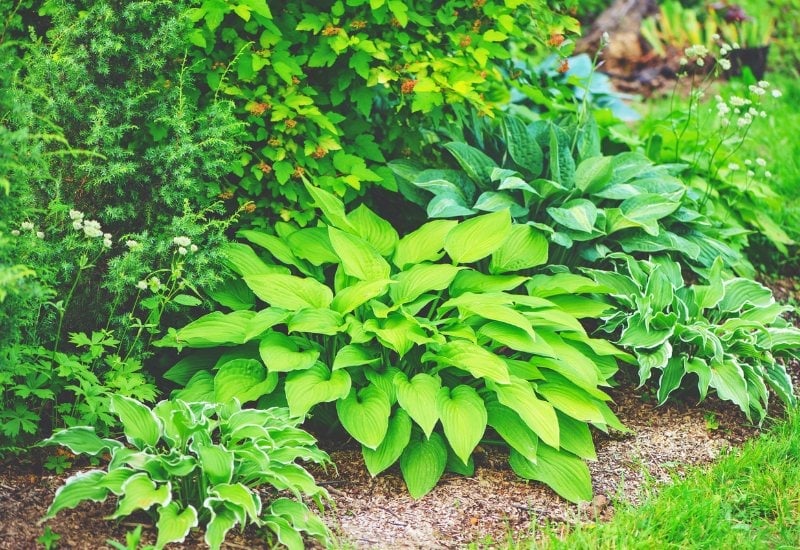
Big and lush, colorful and luxurious, hosta leaves are a wonder of Nature, but they are delicate too, and it can be hard to keep them healthy and strong from spring to fall. We love plantain lilies for their dainty flowers too, but it’s their foliage that fills our gardens with spectacular beauty, even in shady spots. But this glorious leafy display takes up energy, and it needs some extra care from you to stay healthy and looking great all summer long – even long after they finish blooming.
So, why does it seem so hard to keep plantain lilies’ leaves in great shape all season long? The truth is, it’s not as difficult as it seems. Knowing how to properly care for them, when to feed them, how to deadhead blooms, and how to keep pests at bay can make all the difference.
Here’s the great news – with just a few simple care tips, you don’t have to worry about losing your hostas to the summer heat and pests. Even if your hostas are already looking a bit worn out, there are easy tricks to revive them!
With that in mind, let’s take a look at how you can keep your hostas in prime condition. By following a few simple, easy-to-perform summertime tasks, you can keep your hostas full of life, all through the dog days of summer and well into late fall!
Tip 1 – Spring Fertilize Your Hostas

When spring rolls around, it’s time to give your hostas a good kickstart. Early spring is prime time for feeding them, as this promotes strong foliage growth and ensures they develop thick, lush leaves that will lead to robust blooms. You want to use an organic, balanced slow-release fertilizer at this stage. If you’ve got compost, that’s perfect.
Spread about an inch (2.5 cm) of compost around the base of your plantain lilies right when you see the first leaf buds poking out. This will give them the strength to grow big and lush.
If compost isn’t available, any organic granular fertilizer with an NPK ratio of 10-10-10 or 5-3-3 will do the trick. Espoma PT 18 Organic Fertilizer is a top pick, always go for slow-release options to keep your hostas happy and healthy.
Tip 2 – Mulch Your Plantain Lilies

After you have fertilized your hostas in spring, mulch them. This is not so much to keep weeds away, which can compete with them and their foliage, as to keep the soil humid and with stable temperatures at all times.
For hostas, I would suggest a decorative type of mulch, like wood bark. 2 inches (5.0 cm) at the base of your plantain lilies is enough. It will also set off the foliage and keep it from the ground. This way, when it rains, they will keep dry and they won’t rot.
Tip 3 – Water Your Hostas Regularly and Correctly!

Hostas need very regular watering, otherwise their leaves can dry up and yellow. And because the foliage is tender, plantain lilies are quite thirsty, and they need about one inch (2.5 cm) of water every week.
On the other hand, don’t overwater hostas or the leaves may rot, and keep in mind that if it rains, you may suspend irrigation… depending on how much water has fallen. Check that the top inch (2.5 cm) of soil is dry, then quench their thirst.
But what’s even more important is to water hostas correctly! Sometimes, poor leaves are our own fault, and why?
- Only water hostas in the evenings, if you do it during the day, the droplets will have a lens effect on the leaves and they can burn them.
- Water hostas from below, avoid drops and splashes on the leaves and petioles; in wet conditions, they can rot. A drip irrigation system is ideal (not sprinklers), and you can hide it under the mulch…
Hostas like it humid, but not wet.
Tip 4 – Shade Hostas If the Sun and Heat Are Strong

And hostas like mild climates. True, they can stand temperatures to up to 100°F (38°C), but only for a brief time. Ideally, they like to spend their afternoons in the shade, and in reality, I would start worrying about them when the thermometer hits 86°F (30°C), because at 95°F (35°F) they go into heat dormancy.
Too much heat, especially if dry and with poor watering, can damage your plantain lilies’ leaves, so, shade them with a net if you need to, especially in warmer countries.
Tip 5 – Fertilize Your Hostas in Mid-Summer
As summer heats up, it’s time to think about feeding your hostas again. By now, they’ve likely depleted the nutrients from their spring feeding, and they need another boost to keep going strong. Hostas need plenty of energy to produce blooms, and they pull this energy from the soil. Replenishing those nutrients is key to keeping their foliage lush and healthy throughout the season. Without this, their leaves may start to fade before summer’s end.
Use a balanced slow-release fertilizer with an NPK ratio of 10-10-10. Look for all-purpose fertilizers with a Nitrogen-Phosphorous-Potassium (N-P-K) ratio of 5-5-5 or 10-10-10. These will slowly release nutrients to sustain the foliage over time. Natural Alternative 5-5-5 All-Purpose Plant Food is a great option, and compost works just as well. Remove the mulch, spread about an inch (2.5 cm) of compost or a cup of granular fertilizer (follow the instructions), and then cover it up again.
Make sure to do this before watering to help with quicker absorption.
If your plantain lilies are already looking stressed, give them a quick boost with a fast-release liquid fertilizer with an NPK ratio of 10-10-10, like Triple 10 All Purpose Liquid Fertilizer 10-10-10 with Amino Acids. After a couple of weeks, follow up with a slow-release fertilizer to keep them nourished through the rest of the season.
Tip 6 – Deadhead Spent Blooms
Hostas also give us spikes of gracious little flowers, at some stage between May and September (depending on the variety). Enjoy them, but this is also a time to keep an eye on your plantain lilies. Believe it or not, one of the best ways you can help your hostas stay bright and vibrant is to not let them bloom!
As soon as the blossoms are spent, deadhead individual ones, and when all the bloom is over, cut the stems at the base. If you don’t, your hostas will divert energy to seeding, to the detriment of their decorative leaves.
By simply snipping off bloom shoots back to the base of the plant, you can conserve the energy the plant spends on trying to bloom. Not only does it help the foliage stay brighter, but it also keeps the root system more energized as well.
If you do enjoy hosta blooms, deadheading as soon as they begin to fade will help as well. Although they will use resources to flower, cutting these back quickly will help the plant to still conserve some energy.
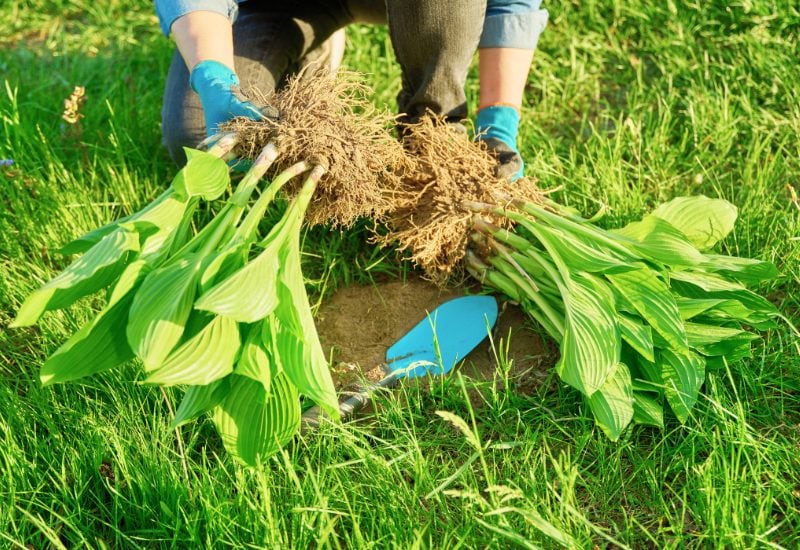
Tip 7 – Divide Thick Hosta Clumps in Summer

Hostas form clumps, which are very attractive, but they can get a bit too thick. If this happens, leaves will compete for light, water and food, and by summertime, they will start showing signs of weakening.
So, go to the base of your hosta plants and, with a spade or garden rake, break up the clump, and transplant one half somewhere else. And here is how you should do it:
- Go down to the side of the clump, about 6 to 8 inches (15 to 20 cm) away from the crown, dig deep, because hostas’ roots can be 18 inches long (45 cm)!
- Lift up the roots, to the side, till you can see all the radical system.
- Keeping as much soil as you can, divide the roots gently, trying not to break them.
And now you can transplant them.
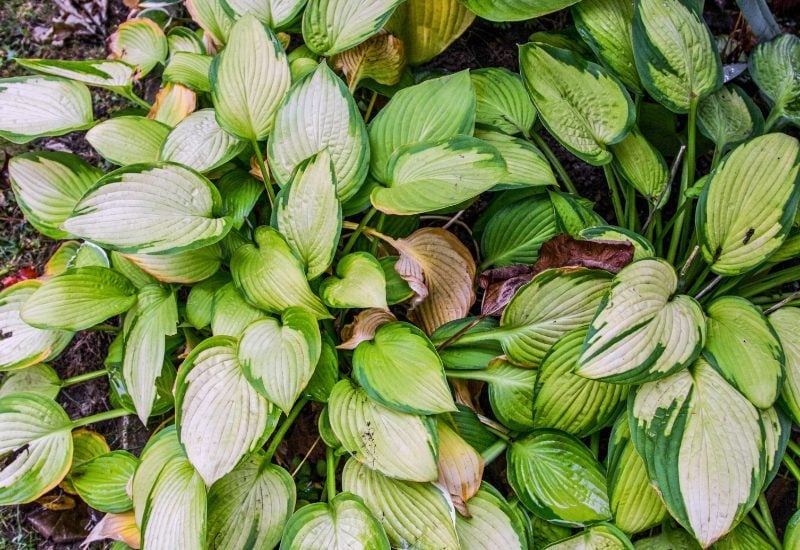
Tip 8 – Rejuvenating Damaged Hostas By Removing Dead and Dying Leaves

Alright, it’s the height of summer, and your hostas look more like droopy lettuce than the lush beauties they should be. Maybe it’s those pesky deer, mischievous rabbits, relentless bugs, scorching heat, or a lack of rain. Whatever the cause, your hostas are looking pretty sad, with leaves that seem beyond saving. It might seem obvious, but there’s no reason to keep these unsightly plants on display. Even better, there’s a way to bring back their beauty in just a few weeks!
When the hosta leaves are beyond repair, the best move is to cut them all the way back to the ground. It might seem drastic, but think of it as a fresh start for your plants. By removing the damaged leaves, you’re helping the hosta focus on producing new, healthy foliage instead of wasting energy on the old, damaged ones.
Grab a sharp pair of hedge shears and trim the leaves down to just above soil level. Once they’ve had their trim, give your hostas a boost with some granular fertilizer and a good watering. It’s like a refreshing drink after a tough day.
Don’t worry, this won’t harm your hostas! In a few weeks, you’ll see new shoots emerging from the ground. Before long, your hostas will be back to their lush, leafy selves, looking as if they’ve just had a rejuvenating spa treatment. It’ll be like spring all over again!
Tip 9 – Keep Pests and Slugs and Snails at Bay!

And now we finally come to the big headache hosta growers have… Pests and slugs and snails; the tender and apparently delicious leaves of hostas are a magnet for gastropods and their dense clumps added to humidity and heat are a perfect breeding ground for pests.
Let’s start with slugs and snails (gastropods); there are many ways you can keep them off your delicate hosta leaves, for example:
- To start with, keep your hostas “isolated” from other leafy plants, weeds etc. So, surround them with mulch, gravel etc. This way, slugs and snails won’t be able to hide under the foliage to reach your plantain lilies.
- Lay a thick layer of coffee grounds around your hostas, slugs and snails hate it, but you will need to top it up through the season as rainfall will wash it away. And make sure that it is a thick band, at least 3 inches (7.5 cm), or they will crawl across it.
- You can add lemon and potato peels to your slug and snail wall, as they are acidic and they don’t like them.
- You can also use broken egg shells, though not everybody is convinced it works andthis study seems to prove it. But if you do, again, make a big, wide band around your plantain lilies (3 inches or 7.5 cm minimum) and a dense mound. And check it after it rains to see if it needs topping up.
- Some gardeners use cucumbers… Yes, sliced up and placed near your hostas, they can attract slugs and snails from them; they like them better!
- Finally, you could use beer to kill slugs and snails… They seem to like a little drinkie, but if you put it in a bowl, they will drown in it…
Salt is not a great idea. Yes, it literally burns the soft skins of slugs and snails, but it is easily dissolved into the ground, and it’s not just a matter of topping it up… Salty soil is really bad for most plants.
And now, on to other pests…
- Check your hostas regularly, especially if it is hot and humid; their dense foliage and clumpy habit can make it hard to spot pests, which can hide under the leaves.
- For most pests and fungi, neem oil is both a deterrent and a killer; a single tablespoon in a 1 lt. spray bottle, with a splash of natural liquid soap is enough. Shake it well and spray your plantain lilies thoroughly, under the leaves and in the middle. Repeat every 14 days or after it rains.
Now Your Hostas Will Keep Their Lush Leaves Healthy and Strong from Spring to Fall!
As you can see, none of these tips is hard to follow or expensive. Hostas only need a bit of keen attention and care, and they will keep their super decorative leaves fresh looking, colorful, healthy and strong all through the season!

Written By
Amber Noyes
Amber Noyes was born and raised in a suburban California town, San Mateo. She holds a master’s degree in horticulture from the University of California as well as a BS in Biology from the University of San Francisco. With experience working on an organic farm, water conservation research, farmers’ markets, and plant nursery, she understands what makes plants thrive and how we can better understand the connection between microclimate and plant health. When she’s not on the land, Amber loves informing people of new ideas/things related to gardening, especially organic gardening, houseplants, and growing plants in a small space.

